Jupyter Notebook
Jupyter Notebook is a web-based interactive application that enables you to create notebook documents that feature live code, interactive plots, widgets, equations, images, etc., and share these documents easily. It is also quite versatile as it can support many programming languages via kernels such as Julia, Python, Ruby, Scala, Haskell, and R.
With the SQLAlchemy library in Python or ipython-sql, you can establish a connection to Databend within a Jupyter Notebook, allowing you to execute queries and visualize your data from Databend directly in the Notebook.
Tutorial: Integrate with Jupyter Notebook using SQLAlchemy
In this tutorial, you will first deploy a local Databend instance and Jupyter Notebook, and then run a sample notebook to connect to your local Databend through the SQLAlchemy library, as well as write and visualize data within the notebook.
Before you start, make sure you have completed the following tasks:
- You have Python installed on your system.
- Download the sample notebook databend.ipynb to a local folder.
Step 1. Deploy Databend
- Follow the Deployment Guide to deploy a local Databend.
- Create a SQL user in Databend. You will use this account to connect to Databend in Jupyter Notebook.
CREATE USER user1 IDENTIFIED BY 'abc123';
GRANT ALL ON *.* TO user1;
Step 2. Deploy Jupyter Notebook
- Install Jupyter Notebook with pip:
pip install notebook
- Install dependencies with pip:
pip install sqlalchemy
pip install pandas
pip install pymysql
Step 3. Run Sample Notebook
- Run the command below to start Jupyter Notebook:
jupyter notebook
This will start up Jupyter and your default browser should start (or open a new tab) to the following URL: http://localhost:8888/tree

On the Files tab, navigate to the sample notebook you downloaded and open it.
In the sample notebook, run the cells sequentially. By doing so, you create a table containing 5 rows in your local Databend, and visualize the data with a bar chart.

Tutorial: Integrate with Jupyter Notebook using ipython-sql
In this tutorial, you will first deploy a local Databend instance and Jupyter Notebook, and then run a sample notebook to connect to your local Databend through ipython-sql, as well as write and visualize data within the notebook.
Before you start, ensure that you have Python installed on your system.
Step 1. Deploy Databend
- Follow the Deployment Guide to deploy a local Databend.
- Create a SQL user in Databend. You will use this account to connect to Databend in Jupyter Notebook.
CREATE USER user1 IDENTIFIED BY 'abc123';
GRANT ALL ON *.* TO user1;
Step 2. Deploy Jupyter Notebook
- Install Jupyter Notebook with pip:
pip install notebook
- Install dependencies with pip:
pip install ipython-sql databend-sqlalchemy
pip install sqlalchemy
Step 3. Create and Connect a Notebook to Databend
- Run the command below to start Jupyter Notebook:
jupyter notebook
This will start up Jupyter and your default browser should start (or open a new tab) to the following URL: http://localhost:8888/tree
Select New > Python 3 to create a notebook.
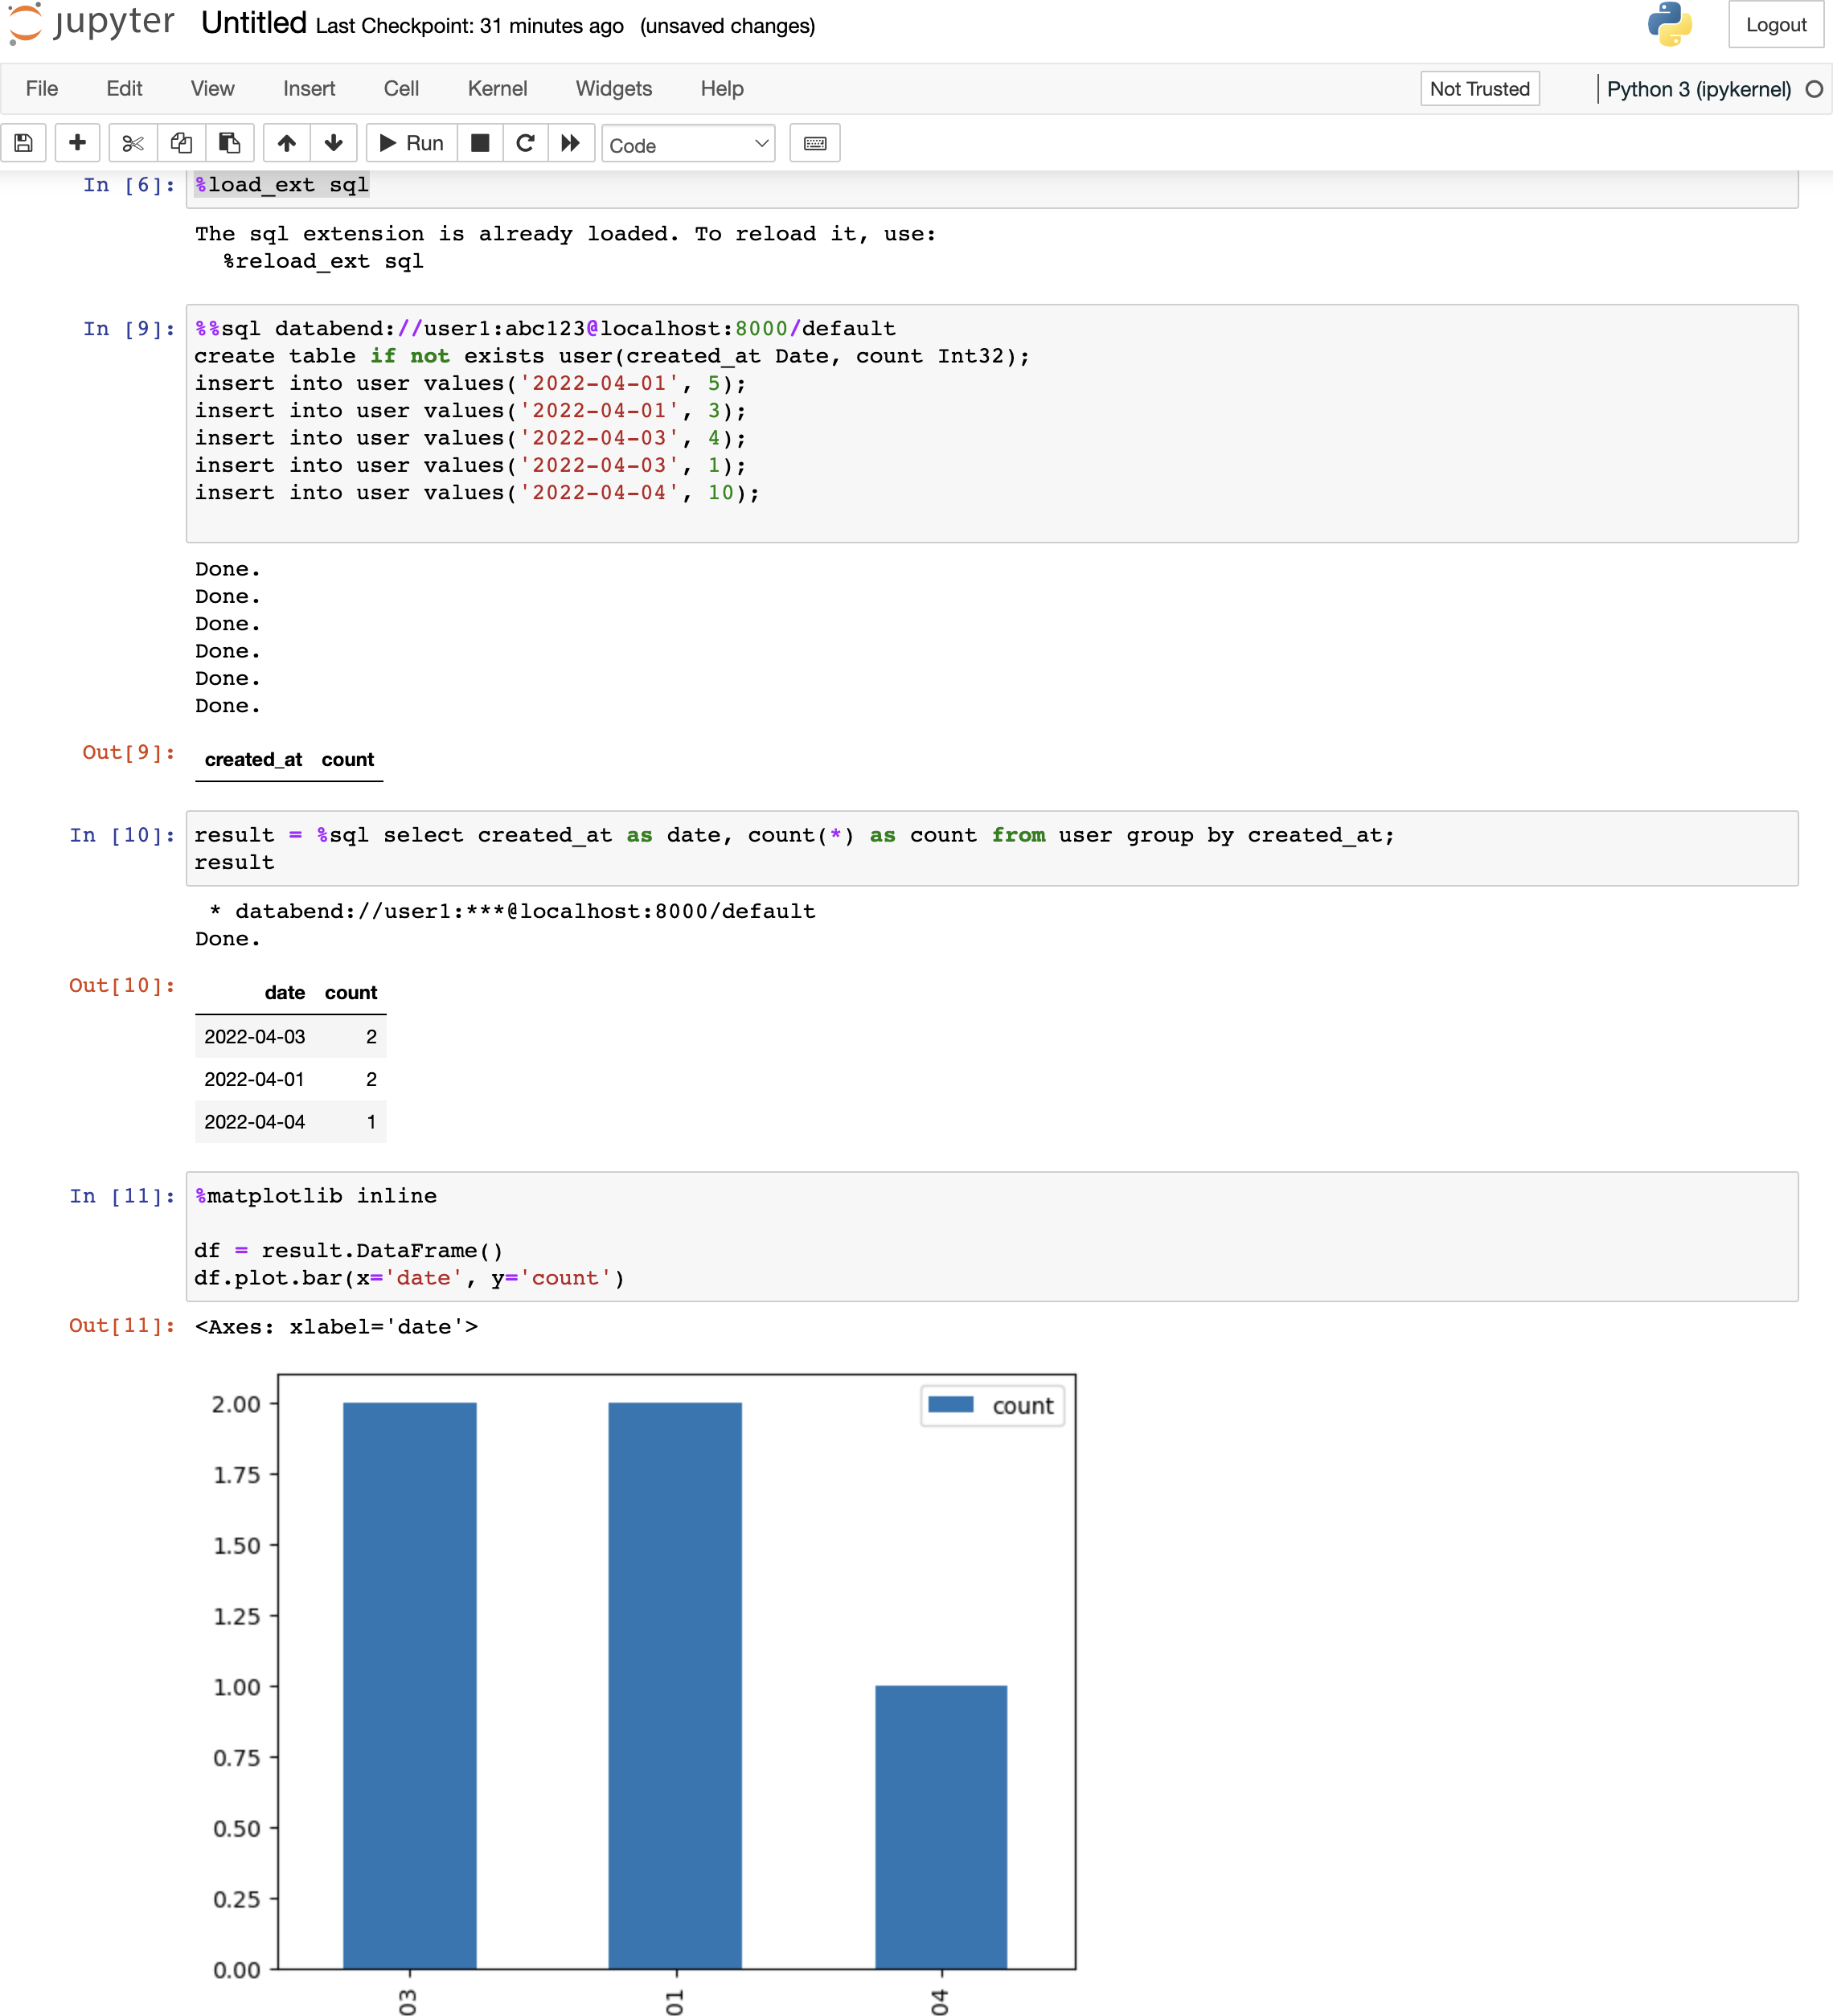
Run the following code sequentially in separate cells. By doing so, you create a table containing 5 rows in your local Databend, and visualize the data with a bar chart.
%load_ext sql
%%sql databend://user1:abc123@localhost:8000/default
create table if not exists user(created_at Date, count Int32);
insert into user values('2022-04-01', 5);
insert into user values('2022-04-01', 3);
insert into user values('2022-04-03', 4);
insert into user values('2022-04-03', 1);
insert into user values('2022-04-04', 10);
result = %sql select created_at as date, count(*) as count from user group by created_at;
result
%matplotlib inline

df = result.DataFrame()
df.plot.bar(x='date', y='count')
You can now see a bar chart on the notebook: